I’ve been playing around with Livebook recently, it’s an amazing tool, even more so considering how new it is.
I had a specific use case where I needed to connect Livebook to a service running inside a private Kubernetes cluster where my QA environment is running. So that Livebook can be used to setup and teardown common QA Scenarios and make it a lot easier to document and execute.
Livebook has several ways to configure the connected runtime, we’re going to be using the Attached node mode.
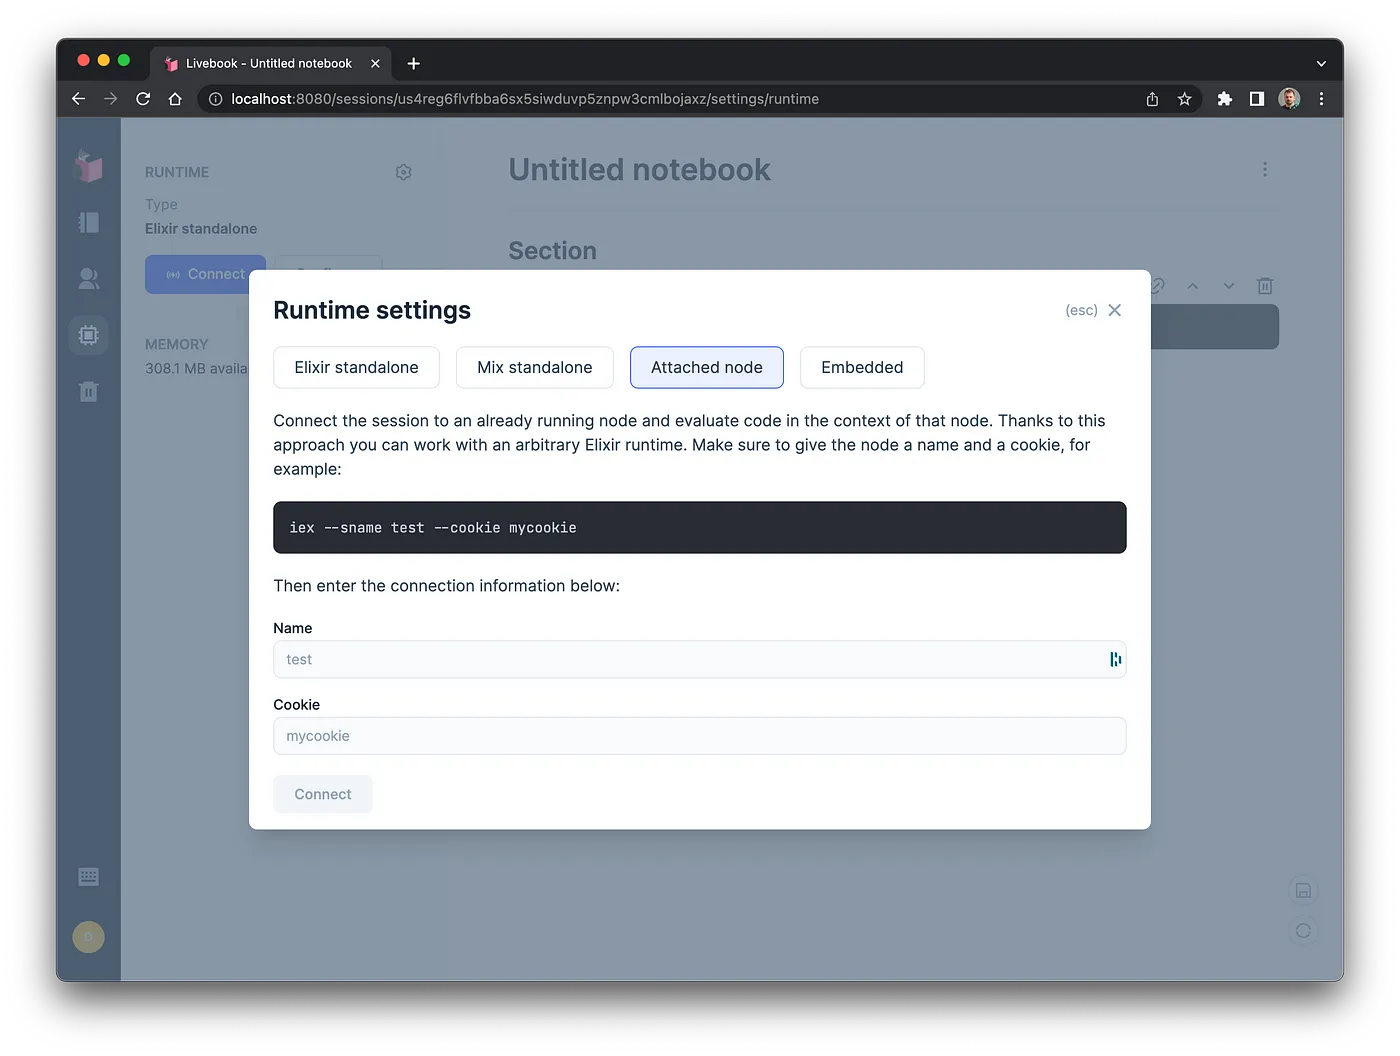
we’re going to be focused on setting up a remote service to be ready to connect to, as well as making a script that allows us to boot livebook already connected to our remote service.
Preparing your service Link to heading
We will assume that your Elixir service is not setup for remote connections / distributed erlang, but if it is you can probably skip this section.
Update Deployment env vars Link to heading
First you need to edit the Kubernetes deployment spec, we need to add in some additional environment variables that will be used to configure the node name and address, we need to add add the additional values for:
RELEASE_COOKIE this should be a secret that is basically the required value to connect to the node later
NAMESPACE we get the pod namespace by using k8s internal valueFrom env vars
POD_IP this will be used in our env script to figure out what to set the node name to, so we can ready the service node
apiVersion: apps/v1
kind: Deployment
spec:
  template:
    spec:
      containers:
      - env:
        - name: PHX_SERVER
          value: "true"
        - name: PHX_HOST
          value: 0.0.0.0
        - name: SECRET_KEY_BASE
          value: notaverygoodsecret

        # Required for distributed connect
        - name: RELEASE_COOKIE
          value: notaverysecretcookie
        - name: NAMESPACE
          valueFrom:
            fieldRef:
              apiVersion: v1
              fieldPath: metadata.namespace
        - name: POD_IP
          valueFrom:
            fieldRef:
              apiVersion: v1
              fieldPath: status.podIP
Update for release and change env script Link to heading
Update mix.ex for releases (this is not 100% essential but keeps things clean and avoids building windows executables in my case):
defmodule TestSvc.MixProject do
  use Mix.Project

  def project do
    [
      app: :test_svc,
      version: "0.1.0",
      elixir: "~> 1.12",
      elixirc_paths: elixirc_paths(Mix.env()),
      compilers: [:gettext] ++ Mix.compilers(),
      start_permanent: Mix.env() == :prod,
      aliases: aliases(),
      releases: releases(), # Add releases line
      deps: deps()
    ]
  end

  defp releases() do
    [
      test_svc: [
        include_executables_for: [:unix]
      ]
    ]
  end

  ...
end
Then run the release init script to create the necessary files
mix release.init
Edit the created env.sh.eex file, it will use the previously configured environment variables to set the release name. Re-deploy the service and you should be good to go.
#!/bin/sh

export POD_A_RECORD=$(echo $POD_IP | sed 's/\./-/g')
export RELEASE_DISTRIBUTION=name
export RELEASE_NODE=test_svc@${POD_A_RECORD}.${NAMESPACE}.pod.cluster.local
In my case the service name on the terminal now looks like something I can address via k8s dns:

In my case my addressable node is test_svc@10–8–7–66.dev.pod.cluster.local this is using Kubernetes DNS. I use this strategy because it’s recommended for this kind of setup from libcluster:
The benefit of using :dns over :ip is that you can establish a remote shell (as well as run observer) by using kubectl port-forward in combination with some entries in /etc/hosts.
Using :hostname is useful when deploying your app to K8S as a stateful set. In this case you can set your erlang name as the fully qualified domain name of the pod which would be something similar to my-app-0.my-service-name.my-namespace.svc.cluster.local
Livebook Link to heading
OK now for the fun part. I decided wrap everything in a simple script to be able to connect. It’s almost too easy!!
#!/bin/sh

# Name of our app/service and executable name from the release
SVC_NAME="test-svc"
EXEC_NAME="test_svc"

# Name for the pod
LIVEBOOK_NAME="danny-livebook"

# Fetch the require env from the service pod
POD_NAME=`kubectl get pod -l app=${SVC_NAME} -o=name`
RELEASE_NODE=`kubectl exec ${POD_NAME} -- ./bin/${EXEC_NAME} eval 'IO.puts(System.get_env("RELEASE_NODE"))'`
RELEASE_COOKIE=`kubectl exec ${POD_NAME} -- ./bin/${EXEC_NAME} eval 'IO.puts(System.get_env("RELEASE_COOKIE"))'`

echo "Found $RELEASE_NODE for pod ${POD_NAME}"

echo "Starting connected livebook"

kubectl run $LIVEBOOK_NAME \
  --image=livebook/livebook \
  --env LIVEBOOK_DEFAULT_RUNTIME="attached:${RELEASE_NODE}:${RELEASE_COOKIE}" \
  --env RELEASE_DISTRIBUTION="name" \
  --env RELEASE_NODE="livebook@127.0.0.1"
What we are doing here, is getting the POD_NAME, RELEASE_NODE and RELEASE_COOKIE using some lookups and execs with kubectl, then we are running a pod in the cluster preconfigured to access the running node.
Run the script to create the pod in the cluster.
In order to access it, we need find the token, we can do that by looking at the logs:
kubectl logs danny-livebook
# [Livebook] Application running at http://localhost:8080?token=<tokenishere>
then we need to port forward using kubectl
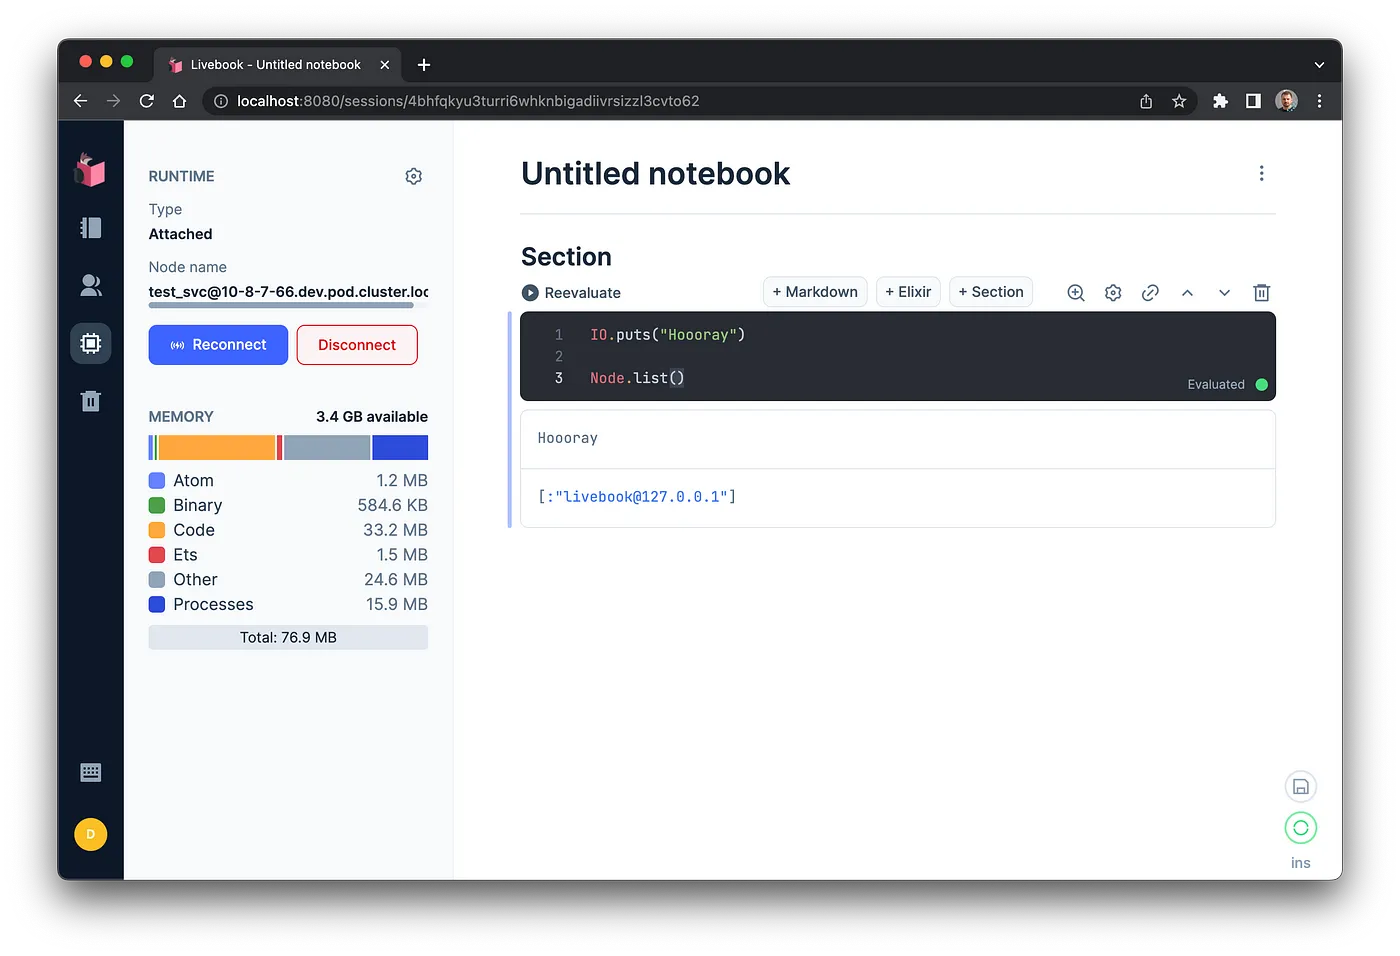
kubectl port-forward danny-livebook 8080:8080
And there we have it, a connected Livebook inside Kubernetes, accessible at localhost:8080
Clean Up Link to heading
When you are finished with your livebook, you can just close the port-foward. Then delete the pod
kubectl delete po/danny-livebook
Bonus: Standalone Node Link to heading
What I’ve covered so far, is the ability to connect to a running node, but if you want to use the same approach to run a standalone node in Kubernetes, all you need is to adjust the Livebook script (and don’t need to run other configuration):
#!/bin/sh

# Name for the pod
LIVEBOOK_NAME="danny-livebook"

echo "Starting livebook"

kubectl run $LIVEBOOK_NAME \
  --image=livebook/livebook
Another Bonus: Cloud Storage Link to heading
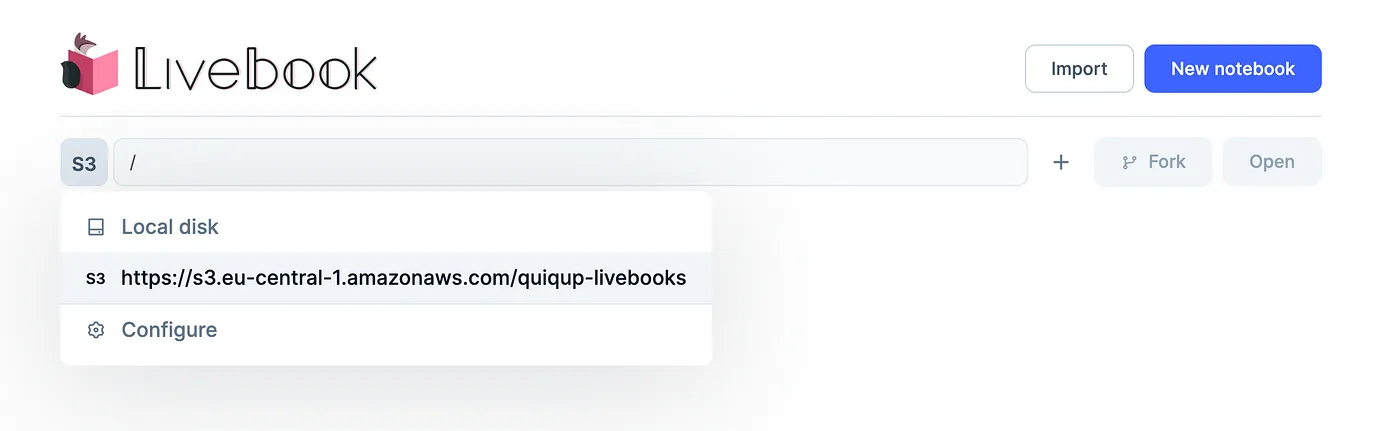
We can add a little bonus to our startup script, if you have an s3 bucket and the credentials you can setup Livebook to always be connected to remote storage when it starts
Just add this line to the startup command:
--env LIVEBOOK_FILE_SYSTEM_1="s3 ${BUCKET} ${ACCESS_KEY} ${ACCESS_KEY_SECRET}" \
Then you will have access to s3 via the Liveview interface